Thursday, May 30, 2013
Turning a Dresser into a TV Stand
-----------------------
Hi Monkey See Monkey Do fans, I'm Abby from GouldThreads. I blog about my crochet (and some knit) creations but also enjoy other crafts and DIY projects. Today I'm here to show you how to turn an old dresser into a new TV stand!
Friday, April 6, 2012
Craft Storage Shelf from a Drawer
Monday, January 9, 2012
Dresser Revamp

My super-wonderful husband and I redid this dresser. It was devastatingly 1960’s-esque.
My mom said it was the very first piece of furniture she bought; she thinks she paid $50 for it back in the 1970's. She & my dad upgraded their bedroom furniture and my husband and I got a free dresser.
I've always disliked it.
These were the handles.
These were the legs.
My husband made new legs for it. After attaching them, we primed it.
We stripped and restained the drawers, filled the holes where the old hardware had been, and painted the outside. (The top was plastic and not wood, so we couldn’t restain it.)
I love it now.
Also, my super-amazing husband parked his car in the driveway instead of the garage for the entire month of December so we could work on the dresser in the warmth of the garage. He also stored all of his clothing in a plastic tub because of the lack of drawer space in our room while the revap was taking place.
He's a keeper.
Tuesday, May 17, 2011
Rocking Chair Reupholstery Part II


Monday, May 9, 2011
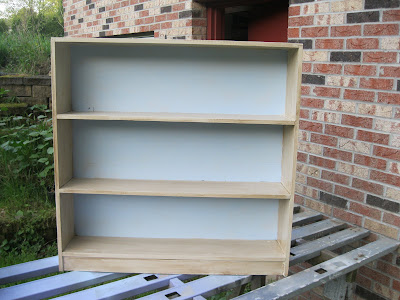
Painting a Bookcase: Before & After
I may make the left one into an art cabinet...but I have to figure out how to remove the bottom part. It was apparently a radiator cover.


You can't tell very well, but I did a glazing technique.
Here are the steps:
1. Prime the whole thing with plain old interior wall primer.
2. Paint the whole thing with interior semi-gloss paint.
3. After it dried, for the glaze, I used a gel stain meant for finishing wood, let it sit on the paint for a few minutes, and then wiped it off. It gave it a grainy look. I don't love it, but it is more interesting than plain off-white.
4. To do the blue back of the shelves, I used a satin finish spray paint. I masked the sides really well, shown below:

 I really like it and can't wait for our house to be finished so we can use it! By the way, the blue shelf backs were a last-minute decision. I wouldn't have painted and glazed them if I thought I was going to spray paint them.
Update: See this post of my toddler's room to see this shelf in action! Love it.
Thursday, September 9, 2010
Another China Hutch Idea...
Game Room Hutch
Monday, June 14, 2010
Garbage Picking
~Computer chair. Perfectly good condition.
~China hutch* (I get SO many compliments on it!)
 ~a tarp. We needed one for our little guy's sandbox. It was enormous and my husband just cleaned it and cut it down into smaller pieces.
~a giant abacus. my husband loves math (engineers!) and so our toddler can learn to count. and learn his colors. I was told this educational toy would normally cost $99.

*The china hutch smelled like smoke. We tried everything to get the scent out (baking soda, vinegar, coffee, Murphy's Oil Soap) and finally had to strip it and refinish it. It looks great, though! And it was completely FREE. I would not have anywhere to keep my grandmother's china if we had not been willing to ask the homeowners if they really intended to throw it away and then lug it home! It is huge so it was a giant task to lug it home. Lucky for me, I found it before the summer I was pregnant so I could not only help my husband drag it home but also use the strong chemicals necessary to strip and refinish it.


