Pages

Wednesday, June 30, 2010

Make Life Easier

~When painting, put the roller or brush in a plastic bag and it'll stay wet for a few days. No need to scrub it out three times over the course of three days.


~Multi-task in the morning....use your hair straighter to iron your clothing (as a touch-up for small spots on a button-down shirt). This won't help you iron an entire dress.

~Why pay the UPS store for foam packing peanuts? Pop some popcorn with an air-popper. Buying packing materials is highway robbery.


~Get stickers off of things like mirrors and glass: use mayonnaise & a putty knife.

~Dry out the bath toys by hanging them in a lingerie laundry bag from a suction cup in the bathtub.


~Cut pizza with scissors. That's what we did at camp when we made pizza for 180 people. It's faster and much easier.


Finishing the Unfinishable Project 2--Myrtle the Turtle Baby Bib

This bib gets the name "Myrtle the Turtle" from my mom's childhood pet turtle of the same name. Myrtle met her(?) unfortunate demise when my grandmother accidentally slammed their enormous front door and squashed the turtle. Terribly sad. I think the next turtle was named Lyrtle. I like the idea of upcycling--using something older to make something novel. So when I saw the idea to make bibs out of old t-shirts, I loved it.

Old t-shirts. Something we have legion of at our house. My husband loves free t-shirts. He probably has four dozen. So I decided to try making a baby bib from one of his shirts. The first one was a giant FAIL. I did not put any interfacing in it and it stretched like crazy. The sides were terribly puckered. I actually threw it away. Even after I monogrammed my son's first inital onto it. It was that bad.
I had cut two t-shirts up for this project, however, and one of them still lay pinned in my sewing box. I decided to finish it. But this time, I added some fusible interfacing. I ironed the interfacing to one side, sewed through all three layers (leaving a gap to turn the bib):

then peeled off the paper to reveal the other side of the fusible interfacing.
I then turned the bib, ironed it again (to fuse the interfacing to both sides) and topstitched around the edges:Then, I added some velcro:
Myrtle was already cut from felt. I'd even cut her a piece of fusible interfacing. After fusing it to her, peeling off the back paper, and then fusing her to the bib, she looked like this:
She was crying out for some topstitching. I used orange thread!
Done.
Lots more bib ideas!
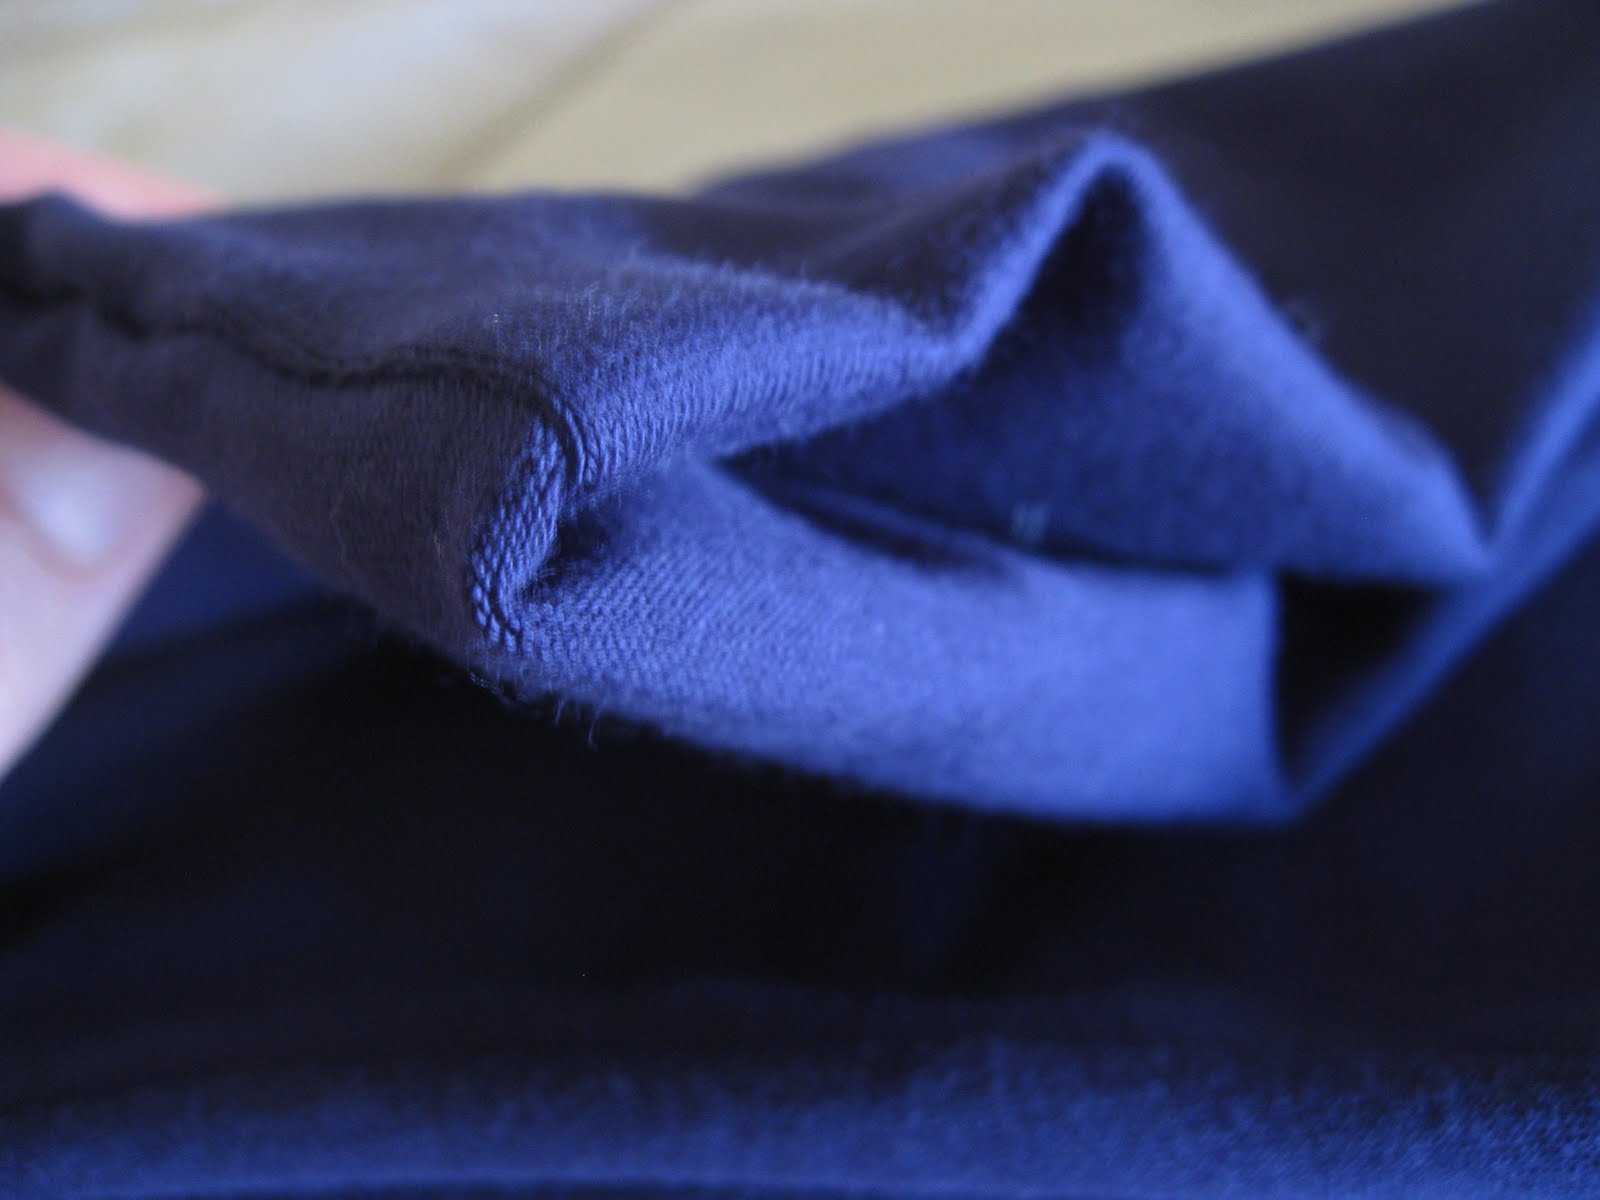
Little Birdie Secrets
Make it and Love it
using scraps

The only problem I am still having involves the fact that it is still puckering at the edges. Is it just because I used knit fabric? Or am I doing something incorrectly? I did iron it. It still puckers. Here is a picture so you can see what I mean...

Tuesday, June 29, 2010

Re-Use Old Things

Here is a collection of ideas I think could be useful:

~Save aluminum foil. Balled up, you can use used aluminum foil to scrub glass baking dishes.
~Use old, clean pantyhose to hang onions, potatoes & garlic in pantry or root cellar. Tie knots in between each vegetable and just cut them off as needed.
~Fill an old sock with baking soda and put it with items stored in the basement (like clothes) to keep them from smelling musty.
~Compost! Put a large plastic bowl in your sink. Place egg shells, coffee grounds (filter, too), fruit/veggie peels, cores & pits in this. Empty it to your compost pit every other day. Good for the soil and also helps you run the garbage disposal less often saving water and electricity.
~Save the cereal box liners (the plastic bags). Dump out the crumbs, fold them up, and store them with your plastic bags. They work for crushing crackers for meatloaf or meatballs.
~Still have more aluminum foil saved? Use it to scrunch around a doorknob while you're painting to keep away the drips.
~Use those free return address labels you get in the mail to label books, tupperware, or other things you may lend. Stick them to your children. Just kidding.
~Trader Joe's (and other grocery stores) sell beer in some neat six-pack configurations. Re-use the six-pack package to put napkins & silverware in at a a picnic.

Another use for white vinegar...

If you have an old paintbrush caked with paint and you feel there's no hope...just soak it in white vinegar for a few minutes and rinse it out! Don't buy a new one....

Finishing the Unfinishable Project 1--Small Velcro Pouch

I had plans to make a bunch of these bags (cut out tons of fabric, interfacing...) about a year and a half ago! I cut out the fabric (it is sort of a trapezoid shape) and intended to sew them together without problems.

This is how they looked:

Upon closer inspection, not too great on that final seam:I learned to do gussets for the first time (to get the bag to stand up by itself, these are along the bottom seam): So I ripped out the final seam on that particular bag and used some bias tape (which I am still learning how to use...it was left over from another failed project):
Much better!

Monday, June 28, 2010

Sugar and Health

There are really no redeeming health qualities about sugar. So next time you're measuring out a cup for baked goods, put a heaping tablespoon back into the container. It'll save sugar and calories and your baked final product will taste the same.

When Brown Sugar Turns Rock-Solid...

Put a piece of bread into the container! It will soften right up.

I am still working on finishing my 'unfinishable projects'. Stay tuned.

Saturday, June 26, 2010

Finishing the Unfinishable

Do you ever start a project (sewing? home improvement? crafting? cooking?) and then deem it 'unfinishable'? Sometimes this happens to me. I have a very hard time with final seams or topstitching for sewing projects. This may stem from impatience. As a result, I have a variety of projects I have just not finished sitting in my fabric box. Sometimes I end up cutting them up to use for other projects. Or sometimes I just try and forget about them and feel sad when I see them!

This weekend, I wanted to start a new project. I don't really want to buy any supplies, though, being my frugal self. (I am thinking I may need to buy grommet pliers to make a few projects I have in mind...) So, I decided to pull out a few of my problematic projects and try to fix them. (ie ripping seams...or troubleshooting!) I'll hopefully have some pictures and tutorials next week!

In the meantime, here's information on rescuing your t-shirts (which can provide great project starters!) from grime and sweat:

How can the smells and stains from the underarms be removed from t-shirts?
Try this:

1) Mix 4-5 teaspoons of baking soda with 1/4 cup water. Rub it into the shirt; allow it to dry.
2) Fill a sink with water and 2 tablespoons of salt and soak it overnight. Rinse and then spray the shirt with vinegar from a spray bottle.

Thursday, June 24, 2010

Yoga Skirt Tutorial

yoga skirt tutorial #yogaskirt #yogaskirttutorial
Want to know how to make a 'yoga' skirt? I got the idea from this website (found another tutorial here) and adapted it slightly. Very slightly. Only to make it easier for my impatient self to finish as fast as possible so I can wear it as much as possible!
I finished it while my little boy was taking his nap this afternoon...it took him 25 minutes to fall asleep and then he slept for an hour, so it took me less than 1.5 hours from start to finish!
Get your fabric. I used 1 yard of fabric for $6 that was 58" wide and 5% spandex (make sure it has spandex! this skirt relies on that to stay up! no elastic!) First, take two measurements. Your waist. And then from your lower hip to however long you want the skirt to be.

Then take the waist measurement and subtract 3" (this allows it to fit snugly and stay up!). Then divide by 2. You are now ready to cut the two panels you'll use for the waistband. Cut each one 15" tall (they will be doubled...you'll see) and then the other edge will correspond to your waist measurement minus 3 divided by two.
Now sew the two panels together like a tube. I used a zig-zag stitch. Make sure you sew along the sides that are 15". Your waist will go through this tube.
Now just fold the panel in half.
Easy.

Now, remember that other measurement you took? I used the full 58" width of fabric for my skirt and cut the length to my specific measurement. It hits below my knees. After you cut it, you're going to gather the fabric. This isn't hard! Just set your sewing machine to the longest running stitch setting...(mine is 5)...sew along the top border but don't back stitch at either end!
Then take the top thread and pull gently (don't break the thread). You'll need to go along and even out the gathers as you go so you don't have an extremely gathered end and then one side with no gathers. (You'll get the point when you do it.)
After you have it gathered, pin the edges and sew up the skirt part.
Now attach the waistband of the skirt to the 'skirt' of the skirt with pins. Make sure you try and even out the gathering. It doesn't have to be perfect, but make sure you don't have any areas that are just flat.
I used a lot of pins.
Then I zig-zag stitched to secure this seam.
You will want to go back and pull out the gathering stitches you made. Make sure you pulled out all the pins, too!

I chose not to hem the bottom of my skirt. The fabric I used curled at the edges and I hate hemming anyway! End result:

Dresses from Shabby Apple

Shower Cleaning Tips

Our shower accumulates a lot of soap scum. I have managed to keep the bottom pretty clean, but the sides have needed some TLC for a while now. I tried something new today!

Take some Borax (sold as '20 Mule Team Borax' for less than $3 at Target) and sprinkle it on the surface of your shower. Scrub with a scrub brush and the soap scum comes off easily. Borax rinses without leaving residue, so it is great for this purpose!

Try Murphy's Oil Soap on the sides and hardware of the shower. I wouldn't use it on the bottom because it will probably make it slippery. (Don't spill the oil soap all over your bathroom floor like I did!) The Murphy's Oil Soap will help keep soap scum from building back up. It also helped remove some of the soap scum in spots that were tough to hit with the scrub brush.

It sounds like I love to clean with all the posts on cleaning lately...but I really don't!!

Wednesday, June 23, 2010

Removing Dust from Curtains

Here's a tip from my mom! I don't really like taking my curtains down to wash, but it's a good idea to do from time to time! Instead of washing them if they're just dusty and not dirty, try throwing them in the dryer on the 'air fluff' cycle with a damp towel.

My mom says that the towel must be damp for this to work.

This keeps the curtains from getting too worn or faded from washing them too often.

Tuesday, June 22, 2010

Price Adjustments

I bought two things at Target on Saturday. (A pair of goggles, gift for Father's Day for my hubby, and a plastic storage bin for our son's outgrown clothing.)

On Sunday, I browsed through the Target ad in the paper. I was bummed to see that both things were on SALE this week and I had spent approximately $2.50 over the sale price.

I checked out the price adjustment policy and was able to go back to Target with just the receipt within 14 days and receive a price adjustment (so I don't have to empty out all of my son's clothing and return the whole bin!)

Is $2.50 worth my time? What do you think?

Money Saving Ideas

~Plan your meals ahead for the week. Limit grocery shopping to one or two trips per week.
~Never throw away bread if it gets stale. Freeze it, and then put it in the blender to make breadcrumbs.
~Eat leftovers for lunch. My husband would never DREAM of going out to eat or ordering food into work more than once or twice a month and then only as a treat.
~Let your kids make birthday cards and then send those to your family members.
~Did you know there is an "Oops Paint Section" at Home Depot? They sell the ''Oops" Colors for a discount.

Sunday, June 20, 2010

Homemade Bagels

I made bagels for the first time and they turned out really well! Here is the recipe:

4 cups of bread flour
1 T sugar
1 1/2 t salt
1 T oil
2 t yeast
1 1/4-1 1/2 cups warm water

Mix all ingredients together. Knead the dough for 10 minutes or until it isn't sticky. All the flour should be mixed in (add more water if necessary). Cut the dough into 8 pieces.
making bagelsLet the dough rest for 10-20 minutes. Make each piece of dough into a rope and pinch the ends together to make a bagel shape.
Rest the dough for 20 minutes. In the meantime, boil a large pot of water and preheat the oven to 400 degrees. Spray a baking sheet with cooking spray. Boil the bagels (as many as will fit in the pot, you don't have to just do one at a time) in the water for 1 minute, then turn them over and boil for another minute. Remove them from the water and onto the baking sheet.
Bake for 10 minutes on each side, for a total of 20 minutes.
how to make homemade bagelsServe and enjoy! Healthier than store-bought as they have no preservatives. Eat them in a few days or freeze them.

Monday, June 14, 2010

Garbage Picking

We walk through our neighborhood nearly every night from April-October (if it isn't raining). There are several occasions we have seen something we could use in someone's trash pile.

~Computer chair. Perfectly good condition.
~China hutch* (I get SO many compliments on it!)~a tarp. We needed one for our little guy's sandbox. It was enormous and my husband just cleaned it and cut it down into smaller pieces.
~a giant abacus. my husband loves math (engineers!) and so our toddler can learn to count. and learn his colors. I was told this educational toy would normally cost $99.

*The china hutch smelled like smoke. We tried everything to get the scent out (baking soda, vinegar, coffee, Murphy's Oil Soap) and finally had to strip it and refinish it. It looks great, though! And it was completely FREE. I would not have anywhere to keep my grandmother's china if we had not been willing to ask the homeowners if they really intended to throw it away and then lug it home! It is huge so it was a giant task to lug it home. Lucky for me, I found it before the summer I was pregnant so I could not only help my husband drag it home but also use the strong chemicals necessary to strip and refinish it.

Sunday, June 13, 2010

Roasted Cauliflower

Cauliflower season is nearly upon us. (I know, you're thinking, "Is it? I don't like cauliflower that much to keep track of when it is in season.") I think cauliflower is ok. Not a favorite, but it is healthy, and we eat it when it is on sale. That was until I made this recipe from an Ellie Krieger cookbook (who is a health food guru on the Food Network, which we don't watch since we don't have cable). I ordered her cookbook from the library after a friend suggested it.roasted cauliflowerYou have to make this even if you think you hate cauliflower.
1 head of cauliflower, cut into florets
2 T olive oil
1/4 t nutmeg
1/4 t salt

Preheat oven to 350 degrees. Toss the cauliflower with the olive oil in a large glass baking dish. Sprinkle with the nutmeg and salt. Cover and bake for 30 minutes. Uncover and bake for an additional 30-45 minutes.

So good. Try it. You'll like it.

Friday, June 11, 2010

Stained Countertops

Don't automatically reach for the bleach! Instead, try a few drops of lemon juice. Let it sit for a few minutes and then scrub with a combination of water and baking soda.

Easy, cheap, and your kitchen or bathroom won't smell like a pool after you're done.

Thursday, June 10, 2010

Brand Name Clothing/Shoes for Cheap

I've found two websites where there are great deals on shoes and clothes.

Try www.6pm.com for shoes. I am checking out a new pair of Chacos...

For clothing, try mjrsales.com. They seem to have items that were returned from catalog orders. I note that they have a 614 area code in their phone number...there are a number of clothing stores headquartered in the Columbus area including Express, The Limited, A&F, and Victoria Secret, so I'm wondering if they are returns from those stores?

I know I'll be checking out these sites next time I need to order shoes or boots.

Cell Phone Batteries

Save money by helping your cell phone's battery last longer.

~Turn it off when you're sleeping or obviously not going to use it. (skiing? at the gym? swimming?)
~Bluetooth devices drain the battery quicker, so avoid using them if you can.
~Keep the battery cool. Sun and heat exposure reduce the life of the battery.
~Drain the battery the whole way before re-charging.

Wednesday, June 9, 2010

Transform a T-Shirt into a Shrug

I saw this idea on a blog I often read and really love! The idea was to take a t-shirt and turn it into a shrug. I love new clothes, but I don't like to spend much money, so this seemed like a great idea! I modified a few things (the shrug was for a little girl, had ruffles, required hemming of the ruffles and I don't like to hem, especially jersey material!)
It actually turned out pretty well! Sometimes my sewing projects don't work out, but I'm pretty pleased with my first attempt this time! I may make some more of these!
I still need to top stitch all around it, but I didn't have the right color of thread today and wanted to post it anyway. Cut the shirt off below the armpits. I left about 5".
Then cut the bottom part of the shirt into strips. I made my strips 2" wide. The key is to end up with enough strip length to go all along the edge of the shrug. I had way too much and wished I would've made the strips wider.
Cut down the front of the shirt and cut the neck off.
I pressed the strips in half, pinning as I pressed. This enabled me to NOT have to hem the edges!

I zig-zagged the edges of the pressed strip. Then, I pinned the strips to the edge of the shrug.

See?
I sewed the strip to the edge of the shrug. I used a "regular" stitch.

Then, I pressed the new edge out (looks like I should've gone ahead and pressed the whole shirt!) I want to top stitch the hem down, but I'd like to use a 'funner' color than white thread. Maybe pink?? I love pink and brown!

Here are some pictures of me modeling the (mostly) finished shrug! I took them in the bathroom for better lighting...

I may actually be able to wear this in public! That has never happened with any of my other sewing projects! This took me a few days to finish and I think that taking my time on it helped make it successful!

Tuesday, June 8, 2010

Spreadsheets and Saving Time

My husband loves to make spreadsheets. I really don't. But I do like making lists, particularly if we're going somewhere. Two weekends ago, we went camping (a great frugal way to take a vacation). We noted that we make the same list every year but forget at least a few things.

This year, we came home, didn't throw away the list, but added a few things we'd forgotten. Then we made a spreadsheet and saved it on the computer. What a great way to save time next year!

Monday, June 7, 2010

Making Spaghetti Sauce

There are lots of reasons one might want to make spaghetti sauce from scratch. I like to do it because I can control how much sugar is added. I have made it with fresh tomatoes when I am lucky enough to have an abundant crop in the late summer. This tutorial won't show how to use fresh tomatoes; it will show how to use canned tomatoes which I feel are more economical most of the year.

Start by gathering the ingredients. I started with four 28-ounce cans (any brand) of whole, peeled tomatoes. I do recommend draining most of the liquid. Pour them into a large pot. I then added an onion, a carrot, 8 cloves of garlic, a bunch of basil (dried, my fresh basil is still growing), crushed red pepper (don't add too much, it seems to grow hotter as it cooks) and majoram. Stir all the ingredients around, crush up the tomatoes with the spoon. They will release their seeds and juices, don't panic.Bring the sauce to a boil. Lower the heat and simmer it for several hours. I did add some salt and some sugar. If you don't want to add any sugar at all, make sure you don't mind the bitter taste. I can't really say how much sugar I added; maybe 2 tablespoons? Stir it every once in awhile. The idea is to boil away the watery part. No one likes watery spaghetti sauce.
...after about four hours, my sauce looked like this (note how it looks thicker and not so watery):
You can see that it "shrank" as the water evaporated. Then I put it in the blender. This chops up the seeds, onion, tomato skins, etc...
And it ends up nice and smooth. Just like from a jar. Except you made it yourself! And it tastes better! I am considering trying to make it in the crock pot next time. I'm not sure that would allow the water to evaporate, though.

If you know how to put it up in canning jars, one could do that. I have never done that and with a toddler stumbling around all over the house, I am not sure I'm up for that this year. It is an interest I'd like to learn at some point in the future.

This can also be used as pizza sauce!