
This project was a
[time consuming] way to create a comfortable, cute mat for my toddler’s room using materials I had on hand.

Do you want to make one???
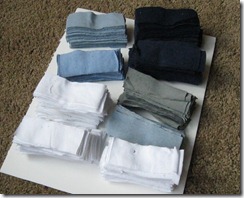
I started by cutting up t-shirts (you’ll need about 10) in the color scheme of his room. His room also has green in it, but I did not have any shirts in the “right” color of green, so I just used navy, gray, light blue, and white.
I made my strips 1 1/2” x 4”. Using a rotary cutter saves a lot of time.

For the backing, I used a white standard-size pillow case. We seem to have an abundance of pillow cases in our linen closet, so we won’t miss this one! It was a little scratchy for my taste anyway.
Side note: my grandmother always called pillow cases “pillow slips”. I referred to it that way in college once and a few friends made fun of me for years!

Anyway, draw lines on the pillow case that are 1” apart. This will be the guide you use for sewing on the strips. Do not assume you can sew a straight line without a guide!

Start sewing on the strips!
To sew on the strips, pinch them in the middle. Backstitch at the beginning and end of each row. My rows run vertically so I could sew fewer strips per row.

Fold the strips over so that you don’t catch them in the next row of stitching.

Keep sewing rows of strips until you’ve completed the mat!
This will probably take a long time. You may have to cut more strips. I sure did.

Up close:

I like how it turned out! I think it would make a great bathroom mat.
My husband made fun of me a bit for taking on this project. I think he wasn’t sure our toddler will use it, considering the little guy rarely sits down!


 Posts
Posts


