Friday, February 12, 2016
Striped Shorts....Made from Polo Shirts!
Thursday, September 5, 2013
DIY Couch Pillows & Covers [the frugal way]
I’ve been wanting new couch pillows for awhile now. I’ve scoured Ikea. (I didn’t like the prints. I didn't like the way all the pillows looked deflated.) I’ve priced new pillows at Target. (Too expensive. Too common.)
Wednesday, March 6, 2013
Colorful Scrappy Pouches (Old Guest Post)
________________
Hi SYTYC friends! I’m Jennifer and I blog over at Monkey See, Monkey Do! I hope you’ll come visit sometime. Check out my project gallery for crafty and sewing ideas and tutorials I have shared. I wanted to share this tutorial for making a colorful pencil case.
I like zippered pouches. [See evidence here, here and here.]
Friday, March 1, 2013
Handmade Tags and Some New Fabric.
I started making crocheted hats and some custom (sewn) bibs for a local store, Perpetual Childhood. Read more about that in this post.
But anyway, the owner wanted me to have tags for my items. She suggested a print shop in town could do them for me. I checked them out, but at this point, they’re a little out of my price range.
Wednesday, January 30, 2013
Upcycled Chevron Purse
I made this little bag using the Buttercup Bag Tutorial at Made By Rae.
I haven’t purchased any of her patterns yet, but I know if I had a serger I would have to try the Washi Dress.
Monday, January 28, 2013
Refashioning a Too-Large Skirt with Bias Tape.
I'm still working through the host of clothing that I've been given or acquired to upcycle. A few posts from the last few weeks: Tunic Refashion for me, knit shirt for a little guy, Bike Shirt for me.
Continuing with that theme, here's a skirt someone gave me. It's a bit big. And long.
Here’s the before. (Please excuse the mess. Must sew, you know!)
Friday, January 18, 2013
Recycled Robot Craft for Kids
Let’s just say my three-year-old doesn’t make a lot of for doing crafts. Until I told him we could make robots. (I made him a robot shirt a few months ago. He likes robots.)
One problem: He thought we were making REAL robots. That would have working buttons. And talk.
Monday, January 14, 2013
T-Shirt Update: Bicycle
What I actually mean: the clothes I have stored in our linen closet with the intent to upcycle tumble out on me every time I open the closet. So I have to get started on these projects!If you are also interested in repurposing clothing, upcycling the worn out shirts, jeans, etc you have been saving, or just making things without spending money, you’re going to love the next few weeks of posts here on Monkey See, Monkey Do! You've already seen the tunic refashion I shared last week.
Friday, December 14, 2012
Upcycled Corbel Shelf
Wednesday, December 12, 2012
Hot Chocolate Mix (Holiday Gift Idea)
Monday, November 19, 2012
A Wreath Made of … What?!
My dad uses a plane to smooth wood in his shop. And the plane makes these curly wood shavings which he felt were rather decorative. And he was trying to think of a way to use them. Because he (like me) can’t bear to throw away scraps of anything.
So he challenged me to use them.
And maybe by itself, it isn’t that great of a wreath. But behind some glass jars, it looks decent and adds some texture to my shelf.
I think I’ll keep it there for now.
Would you like to make one?
Wednesday, June 13, 2012
Organizing with Crates
Wednesday, June 6, 2012
Tuesday, February 14, 2012
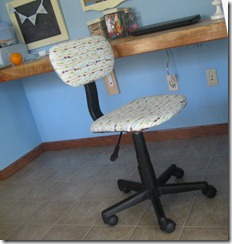
Desk Chair Reupholstery: Before & After

Friday, February 10, 2012
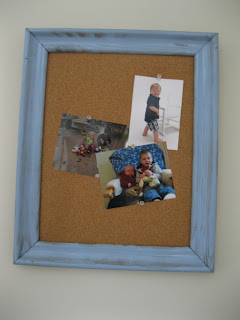
Old Picture Frame into Cork Board
Monday, January 23, 2012
Car Appliqué on Backpack
When we had our little boy this summer, we were the recipients of two plain black backpacks containing free formula. We use one of them for our two-year old to carry his quiet activities to and from church each week. I thought it needed a little something special.
So I added a car appliqué. I used felt and heat and bond; here’s a brief tutorial on how to make your own iron-on appliqués.
I used a car template I printed off of the internet.
First, I bonded all my felt to the heat and bond. Place the shiny side against the fabric and fuse it.
I cut the large car out of blue felt. I next cut out the windows and wheels to use as separate templates.
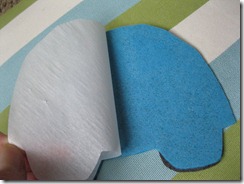
I peeled each piece of the heat and bond backing off and then I fused it to the blue felt.
I did this for each piece. And then I added a “3” to the car.
To finish it all off, I peeled the heat and bond backing off of the blue felt.