Pages

Tuesday, November 30, 2010

Embellished T-Shirt with Ruched Sides

I've had this plain white t-shirt from Target for a long time. It is a bigger size than I wear and was only about $4. So I bought it and wore it a few times. But it needed to be improved. I decided to do some experimentation on it and I love how it turned out!

First, I added the flowers. (I got the idea from this blog post for the flowers.) I cut circles from scraps of a pink t-shirt I had used for some other projects. I sewed them on with straight stitches.
To make the shirt fit better, I wanted to do some ruching to the sides. I did it the same way as this blog.

Monday, November 29, 2010

Making Fabric Flowers

I really think fabric flowers are neat. I made a few of my own from scraps (and even scraps of scraps!)

Start by sewing some strips together. It doesn't matter if they're exactly the same width.
Then, fold the strip in half and sew it with very LONG stitches near the raw edges (my highest length setting on my machine is 4).
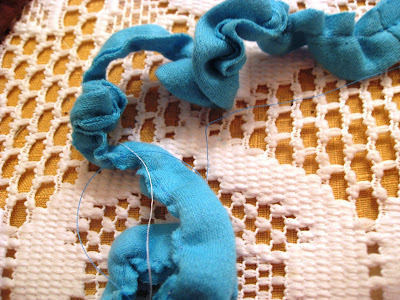
The strip will probably gather as you sew. If not, carefully pull the bottom thread to gather the entire strip so it looks like this:
Then, starting at the middle and sewing down the raw edge, make a circle and stitch each row together. The back won't be too pretty (I'll have some ideas next week for covering this up):
And there you have your flower! To finish, just stitch the raw edge on the tail to the back of the flower.
Some variations:
For the pink flower below, I just gathered a single strip (to try this...don't fold it over to double it...just gather!).For the navy flower, I used a wider width of fabric. This is my favorite look.For the green flower which looks very full, I used a narrower width of fabric, doubled it, and gathered it very tightly before sewing it together.And here's a pink one I made with scraps from a t-shirt skirt.


Friday, November 26, 2010

Small Tote Bag

I made this bag with some really cute denim pants I bought at Goodwill. (I would've been tempted to keep them if they hadn't been made for someone who's at least 6" shorter than my 5'10" self...)
so here's a project I came up with:
I thought it would be easy to put library books or magazines into. I used a tweed fabric on the inside. I love tweed.

Thursday, November 25, 2010

Happy Thanksgiving!

I am trying this recipe for a turkey rub this year. However, I won't be making the turkey until Friday (we're going to the in-laws and my parents are serving pork chops on Thanksgiving!)

I didn't buy and start thawing the turkey til Monday! So Friday is the earliest I can cook it!

Happy Thanksgiving from our family!

Wednesday, November 24, 2010

Want to Make: Even More Baby Shoes

Did you see the results of baby shoe factory last week?

In case you wanted more ideas, here are some more patterns for baby shoes.

Pattern one
booties, not shoes
Mary Janes! Too cute.
Requires button holes. But they look easy other than that detail!
Here's a few cute pairs with cute color combos (boyish)!

Tuesday, November 23, 2010

Denim Velcro Case

I made this from an old pair of jeans. I made the lining and outside the same way I did my button-front pouch found here. I just added a flap and some velcro for the top part!

Monday, November 22, 2010

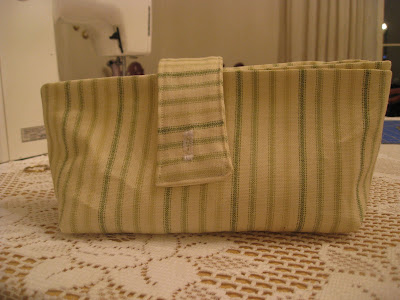
Small Button-Front Bag Tutorial

I got a note from a friend I haven't talked to in awhile yesterday. I decided I wanted to make her something and send it to her. I decided on a quick bag.
I started with four pieces (two for the outside and two for the lining). I used 11"x 7" for both the outside and the lining (so four of that size). And then I cut a 2" x 8ish" (not sure, I sent it to her already!) for the closure.
I sewed the closure pieces right sides together like a tube, turned it, pressed & topstitched it, and then did a small button hole!
I attached this piece to the bag's back.
Then, I sewed the front and back pieces together.Gussets are easy. Here's how to do them. Take the corner of the bag and fold it along the bottom and side seams into a triangular point. Measure 2" from the point and then mark this spot. Sew a straight line parallel to the corner of the bag (the top of the triangle). Does that make sense?
In other words, sew in the direction the pin is pointing. Do this to both bottom corners of the bag and you'll have a nice, flat bottomed bag that will sit on its own.

Sew the lining pieces together but leave a space at the bottom for turning.

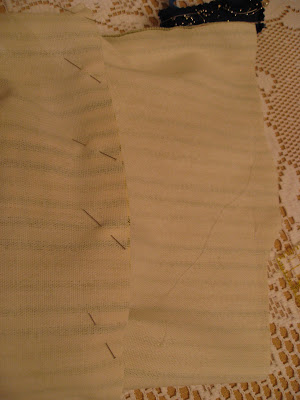
To attach the lining and the rest of the bag, pin the upper edges together (right sides together). Make sure the bag's closure piece is tucked inside so it doesn't get caught in the seam!Sew the bag together along the upper edge of the bag and lining.

To turn it, reach through the hole you left in the lining and grab the outer portion of the bag. Pull it the whole way through until it is right side out. Now push the lining back down into the bag.
You should press it well to get a good, crisp edge along the top.

To finish it off, I topstitched along the upper edge. I also added tucks on either side of the bag to help it have some shape (due to lack of interfacing, it sort of sagged without these tucks).

If you want to add tucks, just pinch the fabric about a half inch on either side of the side seam. Sew 3/4" seam at this half inch mark.
I tried to catch just the outer layer of fabric for this button to hide the stitches.
I should have added this button before sewing the lining into the bag.

Saturday, November 20, 2010

Want to Make: Dyed Onesies (for babies)

A friend and I were talking about dyeing old onesies that have been through the wash many times to help prolong their usefulness. Here are a few great ideas!

This is a great tutorial on dyeing! I could dye onesies or t-shirts. And they show how you can buy a new Old Navy t-shirt for $.99 that says something about a holiday and put an applique over the logo! Love that.

Striped dyed onesie tutorial!

Five easy steps to dyed onesies.

Friday, November 19, 2010

Checkbook Cover

I made two checkbook covers using the tutorial found here. Mine is blue and green:

This picture is just to show off the cute ribbon I used (you can't see any personal information!)I made this one for my mom. She loves red.This is a really great way to use up scraps.

Thursday, November 18, 2010

Want to Make: Fabric Flowers

No-Sew version!
cute with a button in the middle.
for a shirt.
a fabric flower broach using scraps.
using wire for the edges
Really love this fabric.
adorable garland idea (looks good from both sides, need interfacing)
No-sew rolled flowers
flowers with fabric stiffener! stiff without interfacing!

Here's a great project that just includes fabric flowers: fabric cased necklace! LOVE this!!

A great idea for how to use fabric flowers on a cuff band!

Wednesday, November 17, 2010

Baby Shoes!

It was a baby shoe factory (or sweat shop, as my husband likes to say) here this weekend. I made a bunch of these cute baby shoes:
I'll share a how-to in the next few days!

Tuesday, November 16, 2010

Another Baby Blanket

I've got a baby shower to go to ... or I should say "A Sprinkle" (meaning a baby shower but on a smaller scale).

Of course, I wanted to make something. I found a really cute fabric remnant of monkeys at the store. But it wasn't quite wide enough to make a good-sized blanket. I have discovered babies outgrow the teeny-tiny blankets from the store way too fast!


I added two strips of pink fabric (matched the monkeys) to the sides of the blanket. After sewing them (right sides together) I pressed the front so it would lay flat.
Then I pinned it to the yellow flannel back. I cut off the excess from the sides to make it nice and square.I sewed it right sides together, leaving a hole for turning. Then I pressed the sides to make them nice and crisp and then top stitched all around the edges. I made sure to close the hole for turning.

Finished!Up close:

Eversave: $50 of Cards for $20

If you don't have Christmas Cards yet, you've got to join Eversave and buy today's deal. You get $50 of cards for only $20. If you're a new customer for Eversave, you get a $2 credit, so it really only is $18.

I'm kicking myself for ordering from Walmart already...these cards look much cuter and probably would've been less expensive!

Monday, November 15, 2010

Refugee Metal Recipe Boxes

I rescued these from my parents' barn. I call them refugees as they were on their way to the scrap yard. They're someone's old recipe boxes. They need a coat of paint, but first I had to sand off some rust.

I used a power sander with a circular head. The goal is to get the metal smooth so you can put paint on easily.

Here they are after being sanded and primed (I used a metal spray primer):
Then I spray painted them with the lilac color! Here's a closer view. (See below for important spray painting tips!)
And a sideways interior view:
The secret with spray paint is to not be too heavy-handed...keep moving as you spray. You should do a few light coats as opposed to a heavy coat. This will help you avoid runs. If you do have a run, the only way to fix it is to go back and re-sand after the paint has dried.

This was my first spray-paint project!

*Follow the directions on the can regarding drying times between coats.*

Saturday, November 13, 2010

Want to Make: Portable Changing Pad

We lost the changing pad that came with our diaper bag about four months after our little boy was born. I could totally make a new one!

Here's a tutorial!
Here's one using fusible vinyl.

Want to Make: Wallet or Checkbook Cover

cute checkbook cover idea.
I've made this one. Neglected to make one for myself!
here's a wallet idea. Looked complicated.
with ribbon scraps! Love it.

Friday, November 12, 2010

Organize My Craft Supplies

for ribbon scraps; using clothespins for ribbon scraps
Ribbon Organizers: uses a photo box and grommets; this one is from Martha Stewart.

I am making rough plans for building a craft hutch (I found some plans). I have an old radio or TV cart (from the 60's or 70's) and want to make a top for it. I found some old bathroom hardware like towel racks I can spray paint and attach to the sides. Stay tuned for my big idea!

Other things that would be useful for craft organizing:

Wall Organizer.
Art Table Storage for kids (or big people!)
slipcovered plastic crates! no more hurt fingers.
A mail organizer!! Seems like you need a lot of supplies, though. Maybe I need to modify this for the frugal people in the crowd...!

Thursday, November 11, 2010

Reupholstery Project

We found this rocker in my parents' attic. It was my mom's when she was a kid...and probably my Aunt's before that. And then my cousins used it, and then my brother and me.
After we found it, I put it in her car to take to Goodwill.

But then rescued it. I do want to reupholster, so why not start with something small? My little boy can probably use it for awhile yet!

Stay tuned for the project to begin...I have to figure out what tools one needs to take out the tacks.

Wednesday, November 10, 2010

The Mortgage Tax Deduction Myth

I am so tired of hearing about how mortgages are "Good Debt". I have a few articles I wanted to point my readers toward in case anyone was interested in hearing the other argument, that the amount of interest paid to the lender far outweighs the tax deduction the borrower receives from the government.

The Simple Dollar

-Most people don't take deductions anyway! They use the standard deduction. He claims 70% of people use the 1040A to file.

This is on Yahoo

Also, let's explore the differences between a tax deduction and a tax credit. A tax deduction just reduces your tax liability. The TurboTax Blog (I have used Turbo Tax for 6 years to do our taxes myself and NO they are not paying me to say that!) specifices that "a tax credit is something that directly reduces the amount of taxes you owe".

So here's the deal. If you are in the 25% tax bracket and paid $100 of interest on your mortgage (remember, you can only deduct the money you paid in interest, NOT the full mortgage payment) then you can deduct $25 from your adjusted gross income (aka your taxable income). And remember, that's if you aren't part of the 70% of taxpayers who take the standard deduction. So you'll end up saving $6.25 (which is 25% of $25) on your taxes.

So here's the deal. I know most of us want a house. That means we likely need a mortgage. But I don't like when people call it "good debt" just because we have our taxes reduced by a tiny amount to keep paying money to a bank.

I'd rather put down a more substantial down payment so I can own more of my house and throw less of my money toward the bank for interest. This is the opposite of what our financial planner suggests we do. She uses the 'good debt' argument.

Tuesday, November 9, 2010

More Skirts!

I made two more little yoga skirts.
One of them is (possibly) for my cousin who is five. I'm not too sure of the fit.


We'll have to have a fitting session.
I put some elastic into the waist of both of these. I just did a fold-over waist and stuck the elastic in before I sewed the waistband to the skirt.
No applique on this one yet. I need some new ideas.