

My outstanding husband got me a laptop for Christmas. My very own laptop! I couldn't believe it. I decided it needed me to make it a case.
This case is made from two inner layers of fleece and an outer layer of cotton fabric, so it isn't going to protect it from all that much; but I figure it should help it not get unnecessarily scratched. Plus, it looks cute!
I sized it as L=(L+H+1") and W=(W+H+1"). My dimensions ended up being 17.5" x 12.5".
Here are the two fleece layers. I stitched around the top of each set and then stitched all four layers together to make the lining. I left an open space at the bottom for turning.

The outer layers are shown below. Go ahead and stitch around three sides, then clip the corners.

The flap (before shaping it to a point):

I wanted to center my velcro. I only had a strip that was 5" or so long, so I centered that strip and then angled the sides down with a ruler.

I sewed around the flap and clipped the corners. I turned it and ironed it flat. Next, I added one velcro strip.

To assemble the whole thing, pin the lining to the outer fabric with right sides together. Add the flap and make sure that the velcro will face the correct way when the case is turned with right sides out. (I did a "test turn" before stitching the top seam. I did jab my hand with the pins, but it saved ripping out the whole seam.)

After stitching the top seam, pull the outer fabric through the hole left in the bottom of the lining.

Before doing any other finishing work, I tested to make sure the computer fit inside the case!
(It did!!)
I stitched up the hole in the lining.

Mark where the other piece of velcro should go.

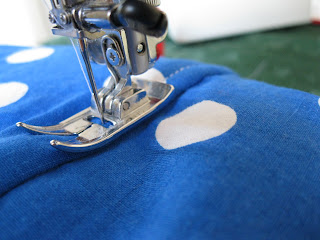
Top stitch around the upper edge of the laptop case.
There's the case! All done, right? Hmm...

I could have stopped here. But the stitching from the velcro was bothering me.

I was afraid this seam was going to bother me. But I wanted to attach the velcro to both layers of the flap to prevent it from ripping through just one layer.

Here's a peek at how I covered it up. Isn't embellishing so much more fun than plain old sewing? Tomorrow I'll show you how I made and attached the flowers to make my laptop case a whole lot prettier and to cover a nasty (yet necessary) seam.


Thanks for this great tutorial. I am going to modify it though for my Kindle.
ReplyDeleteWish I'd seen this before I had to wing it last week! Much more sensible than the one I made lol Kate x
ReplyDeleteI love the flowers you added. Thank you for sharing. I'm your newest follower. I'm having my first link party tomorrow (Monday). It would be great if you could stop by and post your project. http://diyhshp.blogspot.com/
ReplyDeleteThanks for the tutorial. I love the flowers! I found you from Skip to My Lou. I would love for you to check out my blog!
ReplyDeleteMelanie
youmadethat.blogspot.com
hi Jennifer.i just adored your awesome tutorials,really inspire me to do them by myself. thanks.thanks.
ReplyDeletekaykay,malaysia.
Jamie, I did not link up last week, but I just did for this week's! :) Jen
ReplyDelete