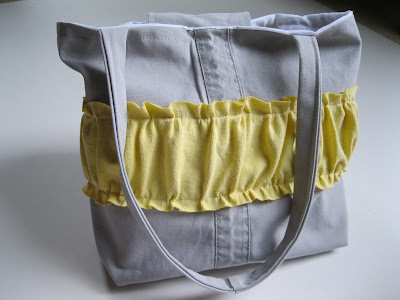
Thursday, July 28, 2011
Using T-Shirt Scraps
Tuesday, July 26, 2011
Fuzzy Ribbon Baby Toy II
Sunday, July 24, 2011
It’s a BOY!
I am so excited to say that we had our baby last Monday! It has taken me this long to get it onto the blog…I LOVE being a mommy to two boys but wow, newborns are lots of work! I’ve been trying to rest when possible (going to bed at 9 pm! napping when I can get both boys to nap at the same time!) so that I don’t turn into a complete grouch.
The baby weighs 8# 14 oz and is 21.5 inches long. He was a big guy! And if anyone is interested…I had a successful VBAC. (I had a C-section with our older son because he was breech.)
We’re moving into our house next week!
Talk about a lot of changes in our lives!
Here’s two pictures of this last week’s progress in the kitchen and our fireplace in progress.
Friday, July 22, 2011
Zipper Pouch with Flower
Wednesday, July 20, 2011
Taffeta Flower Headbands
Monday, July 18, 2011
Yellow and Gray Ruffle Bag
Friday, July 15, 2011
Baby Burp Cloths
Thursday, July 14, 2011
No Baby Yet…
My due date is tomorrow! Sorry for the lack of tutorials and posts this week, I've scheduled some for the next few weeks to keep everyone entertained while I welcome our new baby (hopefully soon!)
Just waiting around in this mid-July heat and trying to keep my 2-year old entertained!
Meanwhile, check out this super good idea for using old trophies. I've always wondered what to do with those things....
http://reuseandupcycle.blogspot.com/2011/06/trophy-coat-rack.html
Tuesday, July 12, 2011
More Baby Shoes
Monday, July 11, 2011
Quick and Easy Pillowcase Alteration!--Guest Post
My name is Sarah Allman and I am the creator and founder of
B.I.B.S. (Baby Items By Sarah).
I hope you will take a few moments to learn more about my company by
visiting the links at the end of this blog!
I am so excited to do a guest post for Monkey See, Monkey Do and I hope you enjoy my
tutorial below for a quick and easy pillowcase alteration!
Turn your pillowcase inside out and pin the open edge together to keep your seams straight; add a few extra pins along the way to keep your material together. Starting from the open edge, measure 17" (add a half an inch to each edge to accommodate for your seams) inwards. From the bottom edge of the pillowcase, measure 13" upwards (add a half an inch to each edge to accommodate for your seams).
My Mom and Grandma taught me how to crochet at a very young age. I always loved to make afghans during the winter months and as I got older I began to make baby blankets for family.
In May of 2009, I gave birth nearly two months early to our daughter. As a result, she spent three weeks in the NICU. During that time I became incredibly touched by the people that donated crocheted beanies for the preemies to wear during their hospital stay. In an effort to give back, I spent the next months crocheting tiny beanies and by Easter of 2010, my husband and I made a trip back to the NICU in St. Louis where Ava was born and donated a hat for nearly every day that Ava was there (I was ONE short!). My love for crocheting and children has since developed into B.I.B.S.!
Find me on Facebook for the latest products and specials!
http://www.facebook.com/pages/B-I-B-S-Baby-Items-By-Sarah/
154525424566359
Visit my Etsy Store!
http://www.etsy.com/shop/babyitemsbysarah
Thanks again to Jen for my guest post!
Friday, July 8, 2011
Guest Post from Michelle of Delicate Construction
Hello Monkey See, Monkey Do readers!!! I am soooo happy to be here!!
My name is Michelle and my blog is called Delicate Construction! I am a wife, mommy, full time caregiver and teacher living in San Diego, California. I blog about crafts, family, decorating, and kids activities in various features and linky parties; Made by Little Hands Mondays for the kiddies and Delicately Constructed Fridays for the Mamas! I also love to share tips in one of my favorite weekly posts; 10 New Uses Tuesdays! I would love to have you come visit!! I am also always looking for guest bloggers for my Sunday feature and interviewees for my Seven on Saturdays!
But back to the crafting, it is why we all gathered here right?!
I am going to share a tutorial for my 'his' and 'hers' pillow cases I made as a kind of cheeky little joke...cause I am like that.
Cute right?! It is funny because of the drastic differences in my husband and my pillows... can you tell now?
Do you see it?! My husband is a self proclaimed pillow SNOB. LOL. He likes the
(did I mention sarcasm is my second language, even in sewing, because it is...just sayin' lol)
And here is how I did it:
Materials:
- Pillowcase (I made mine using this tutorial from Made)
- Letters (any template you have, I made mine from word art in Microsoft Word)
- Steam a Seam or other fusible webbing or iron on seam
- Scissors
- Sewing machine
- Iron
- Pen
Here is the starting pillowcase I made, you will want to take into consideration which way you like the openings, we put them both facing out, some do it facing the same way. It matters when you go to add the letters and which direction they are sewn on.
Cut out your letters or use a pre-made template, in Microsoft Word there is word art that is just outlined block letters and I typed in my words, enlarged them and printed them out.
Next, (this is dependent on what you use, I am following my package directions for the next couple of steps) trace your letters on the steam a seam BACKWARDS, also make sure this is the side that webbing is connected to on the underside.
Since mine fit on one page, I then cut them apart.
Next, lay out your white fabric (or whatever you are using for the letters) FACE DOWN and iron it to warm it up.
Then, peel off the underside of the paper and lay the webbing/ second paper that you traced on, on top of the fabric.
Then, carefully cut out your letters once again with the fabric.
Now, you are ready to iron them on but I found it difficult to eyeball it with the pillow case laid out flat so I turned it over and folded each edge to the center, kind of like bias tape.
Then, flip it over, this was much easier for me to eyeball the center for the placement of my letters.
Then, arrange them how you want,
and iron them down in place.
Last, all you have to do is sew very close to the edge as best you can, just to make sure everything stays in place.
Now, they are all ready for a laugh!
I will do a lot to make that hubby of mine chuckle.
Thanks Jennifer, so much for having me today!! I really appreciate it!! I hope to see all of you over at my little corner of the internet soon!!